Step by step to the result
Whether you are creating a survey or just want to vote – here is how it works.
The basics
Create a poll, share it, evaluate it and close it with a fixed date.
Account and security
Optional account, recovery and two-factor sign-in (2FA).
Premium: branding and export
Your own logo and colour, templates, PDF printing and calendar file.
Premium: team and organisation
Teams, invitations, folder storage and shared branding.
Create a date poll
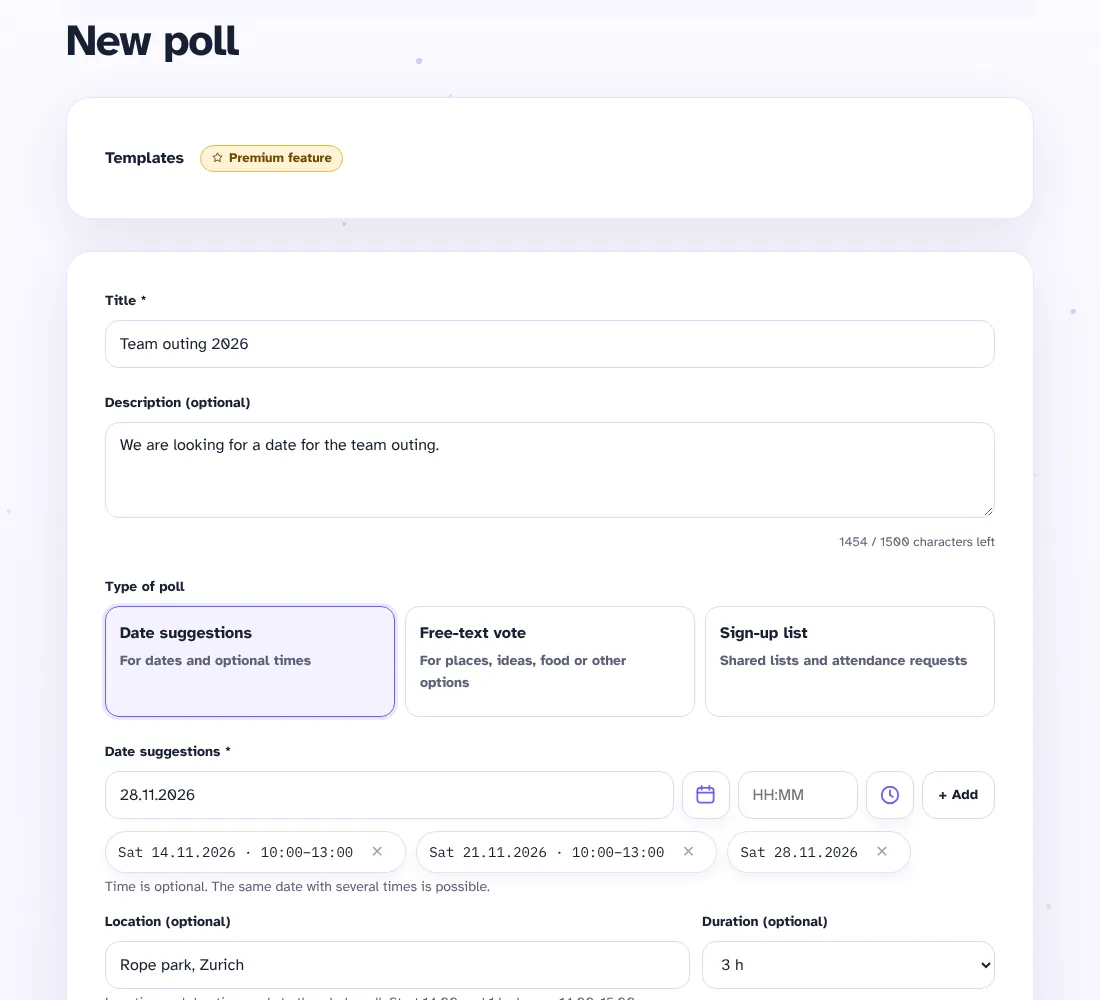
- Open terminsuche.ch and choose the type of vote: date suggestions, free-text vote or sign-up list.
- Enter a title and, if you like, a description.
- Add dates. You can type date and time in short form (7.7. or 750 for 07:50) or pick them with the icons. Several times per date are possible.
- Optional: add a location and duration, or require binding answers (yes or no only).
- Choose the automatic deletion and tap “Create poll”.
Share and vote
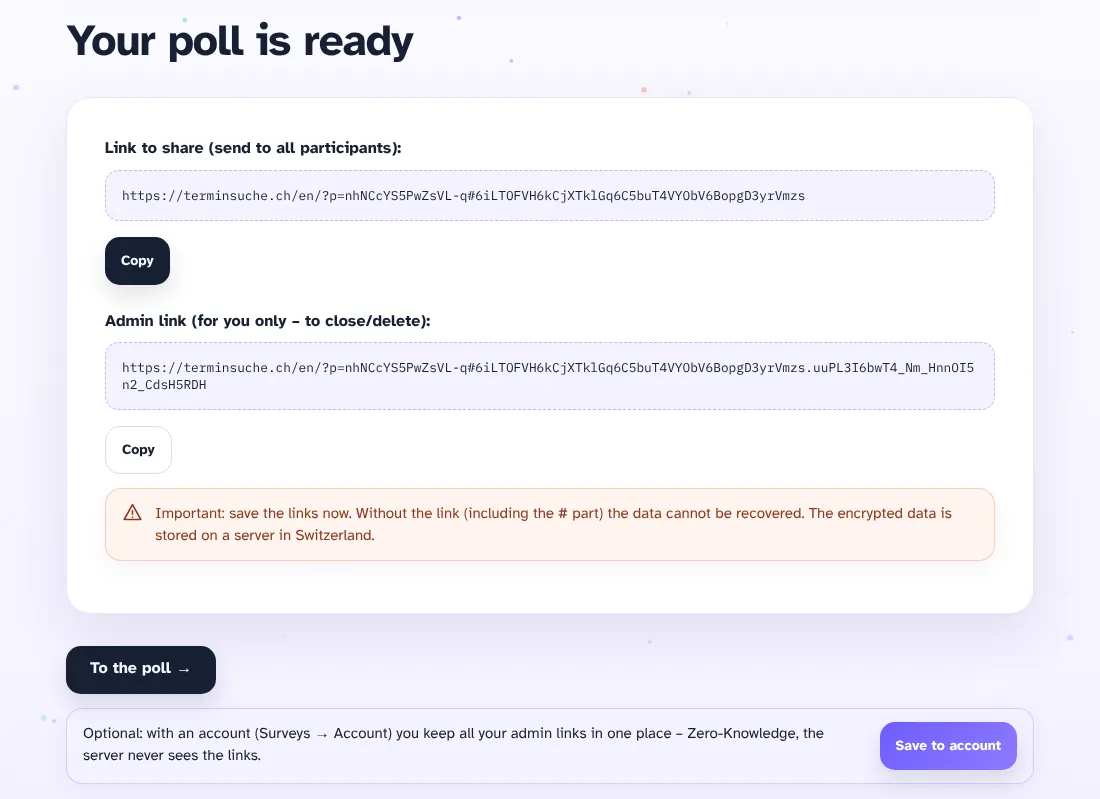
- After creating the poll you see two links: the participant link and the admin link. Save both.
- Send the participant link to everyone who should take part. It gives no admin access.
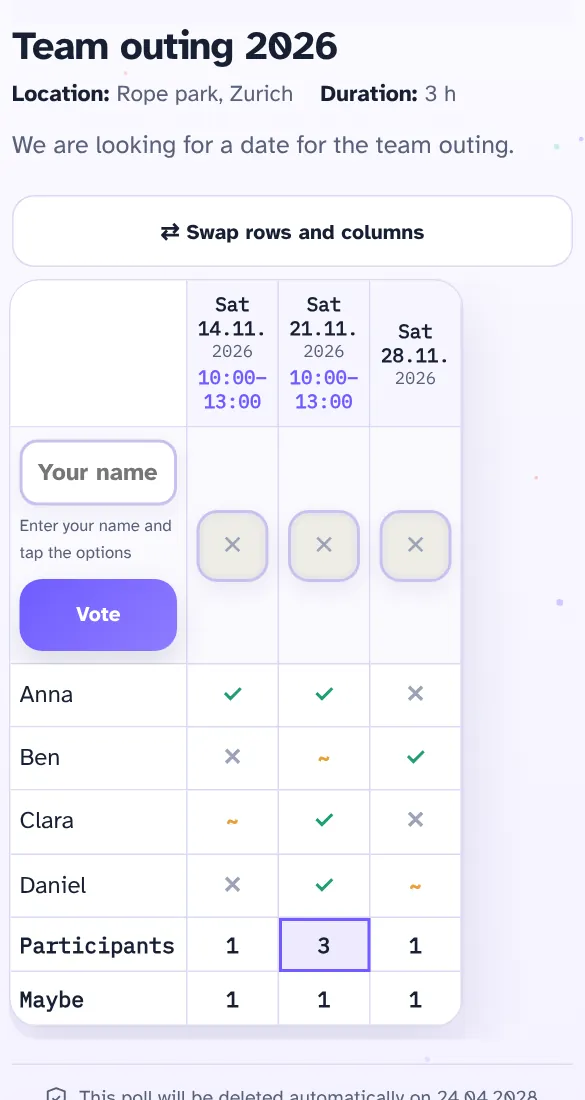
- Participants open the link, enter their name and tap ✓ (works), ~ (maybe) or ✕ (does not work) for each date. For lists and free text they fill in the fields.
- With “Vote” the vote is saved. Participants do not need an account.
Manage the poll
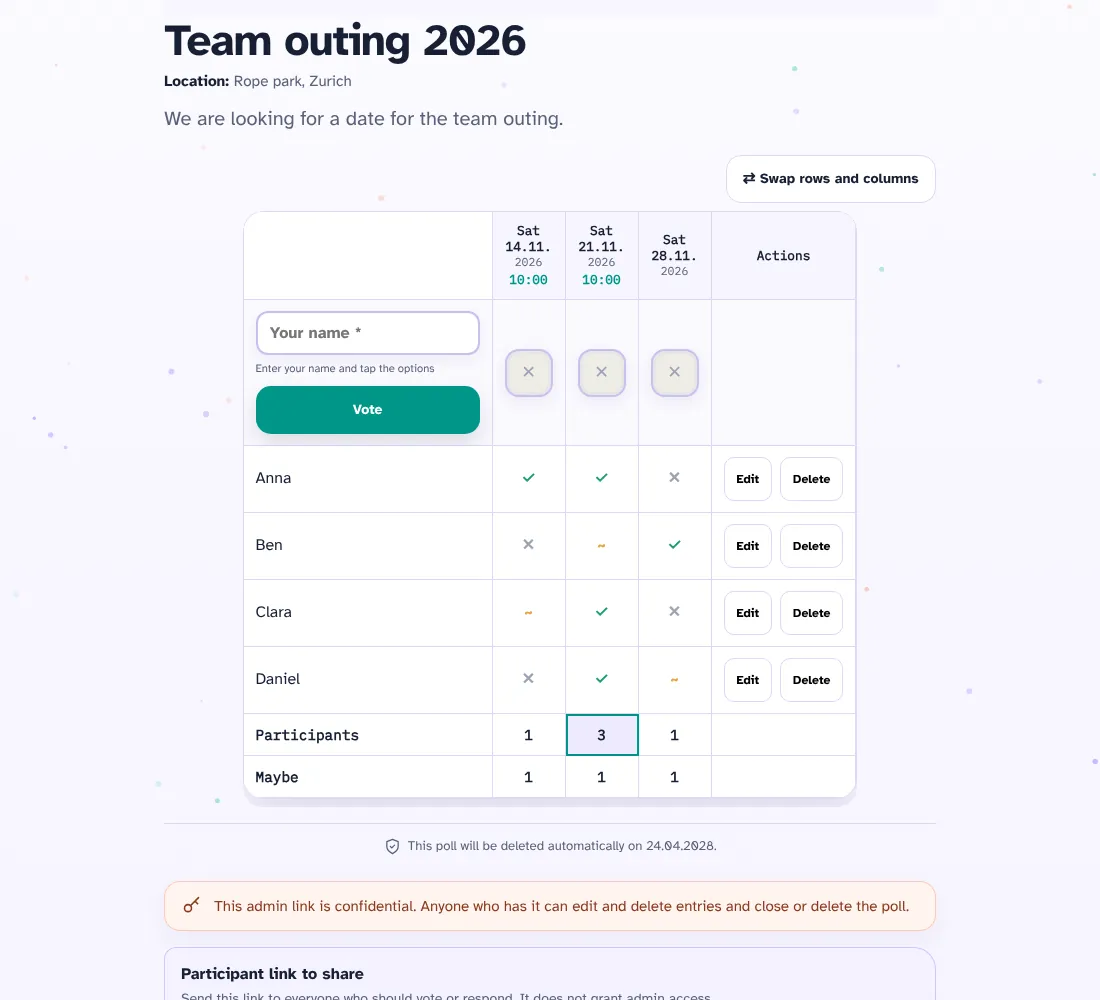
Open the admin link. There you can:
- edit or delete individual votes
- filter participants by name, option or answer
- swap rows and columns
- export the result as an Excel file or print it as a PDF
- edit the description
- close or delete the poll
Important: the admin link is confidential. Whoever has it can change entries and delete the poll. The highlighted number in the totals row shows the most popular option.
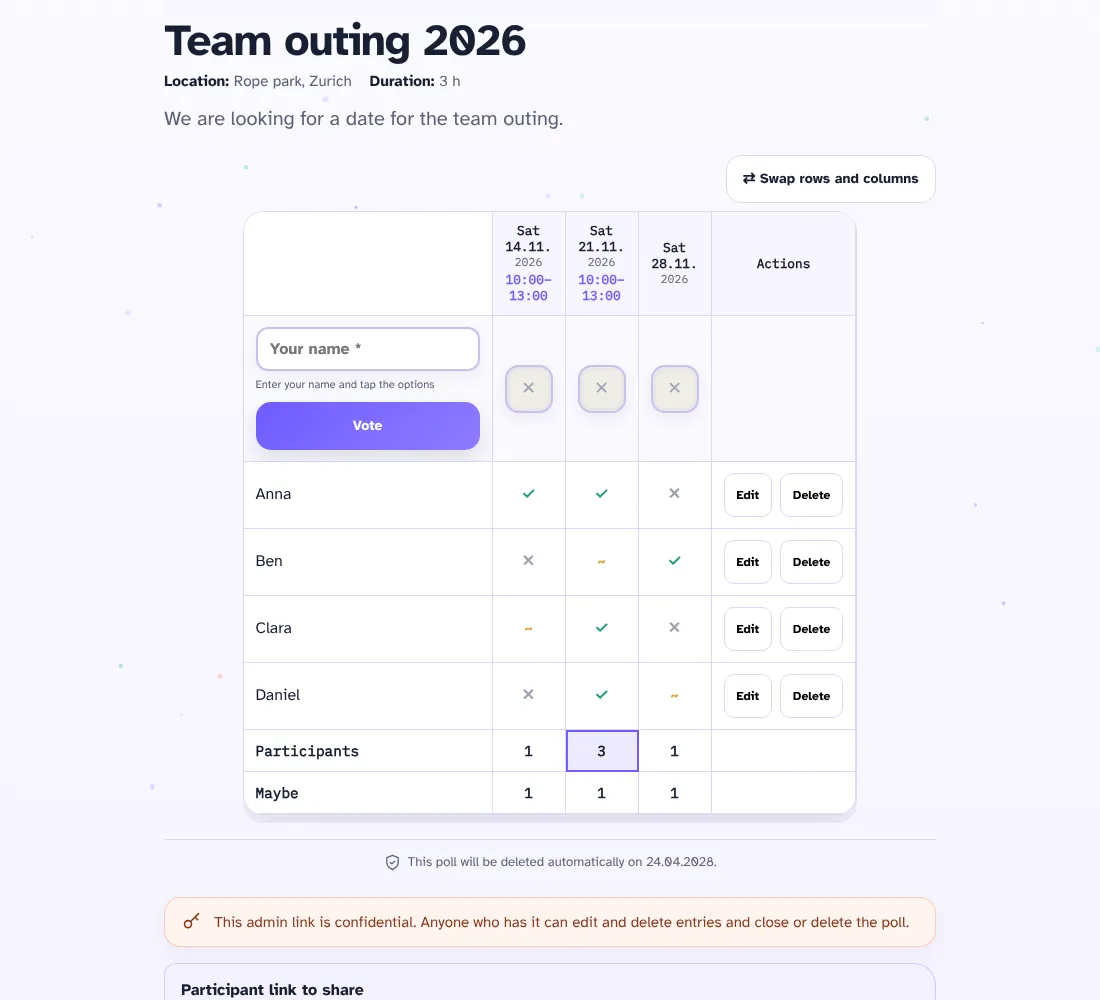
Set the date and close the poll
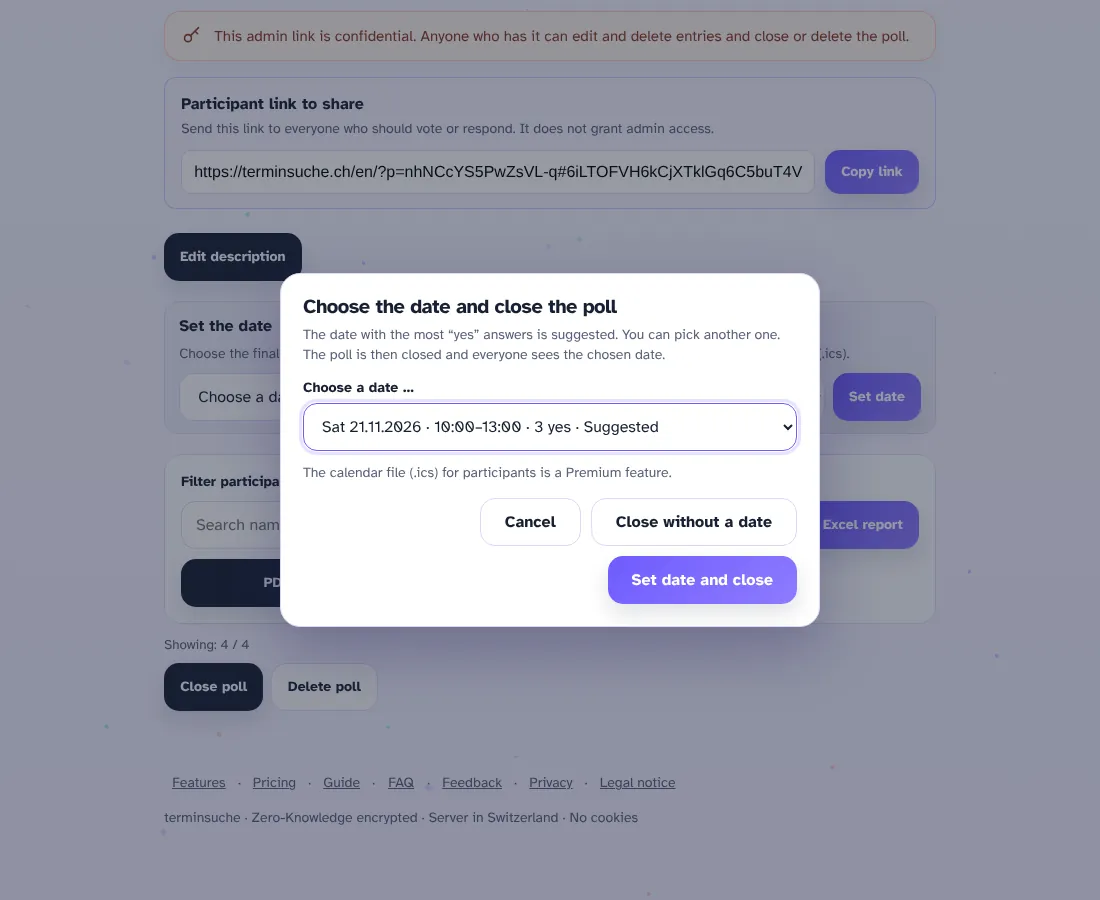
- Open the admin link and tap “Close poll”.
- In the window “Choose the date and close the poll” the date with the most “yes” answers is preselected. You can pick another date or finish with “Close without a date”.
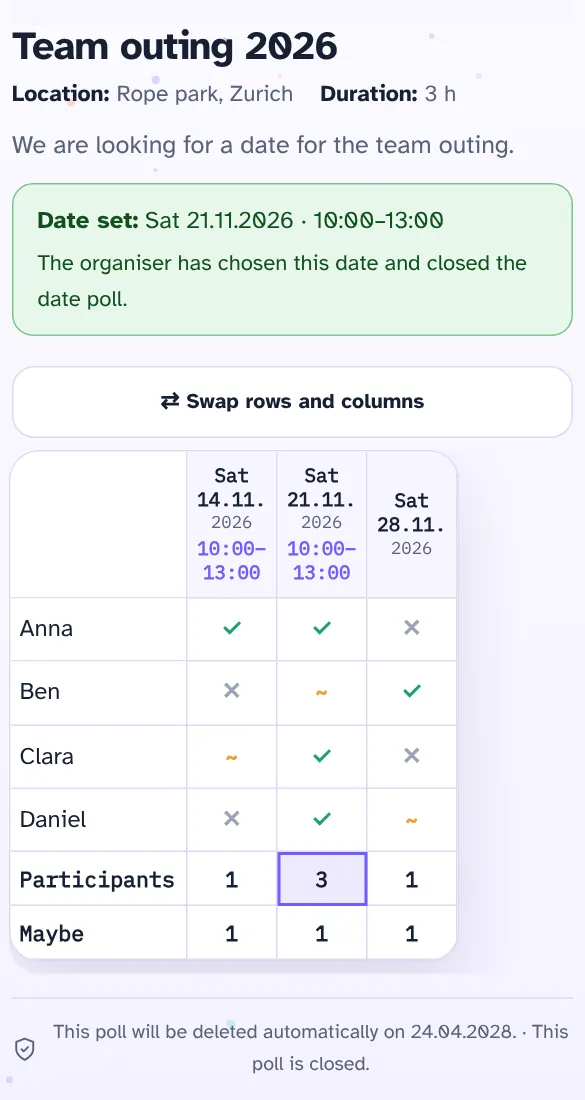
- With “Set date and close” the poll is closed. Anyone opening the link later reads at the top: the organiser has chosen this date and closed the date poll.
Premium: participants can download the date as a calendar file with “Add to calendar (.ics)” if the poll was created with a Premium plan. With “Set date” you set the date without closing the poll; “Withdraw date” undoes it.
Other types of vote
Free-text votes (places, ideas, food, also with numbers), sign-up lists (helper shifts, cake buffet, registrations) and questionnaires work on the same principle: share the link, collect the answers, evaluate the result. More: free-text vote, sign-up lists and questionnaire.
Create an account (optional)
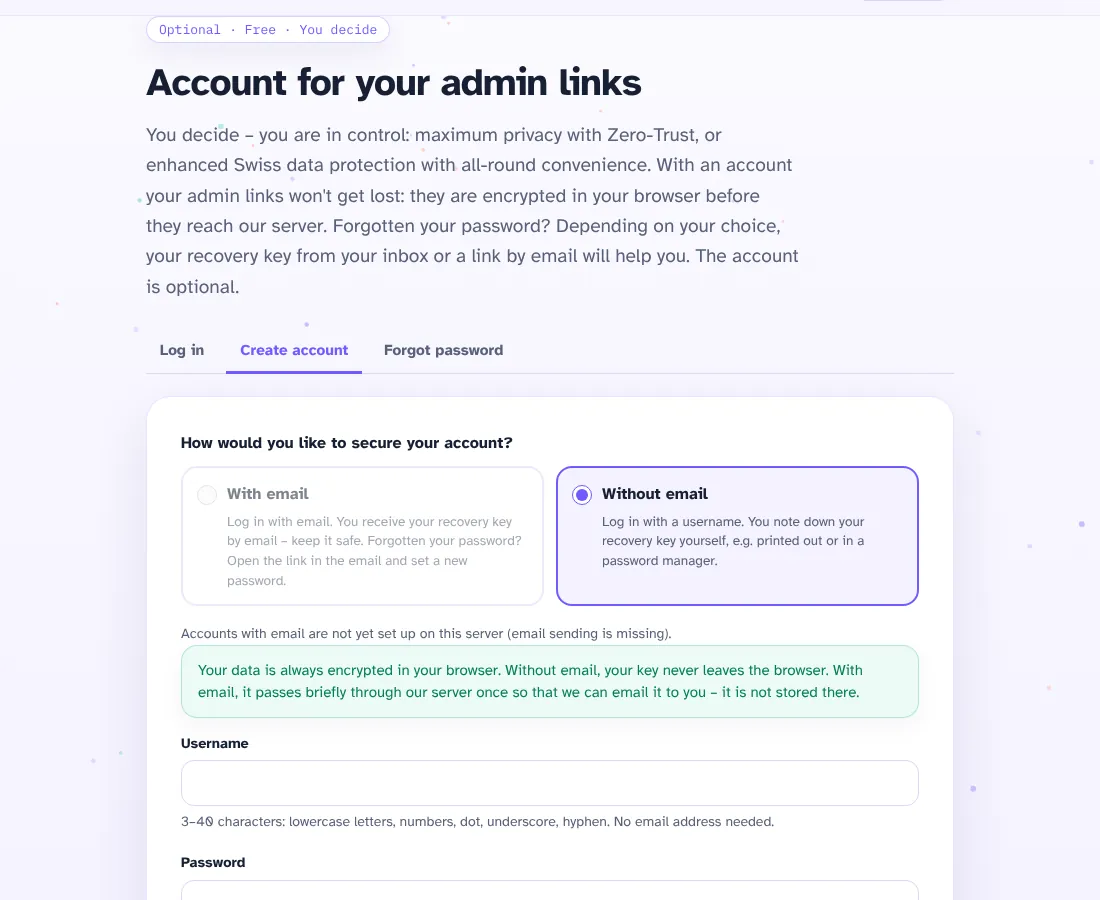
- At the top right choose “Log in” and then “Create account”.
- Choose how to secure your account: with or without an e-mail address.
- Enter a username (or your e-mail address) and a password of at least 10 characters.
- Write down the recovery code or save it in your password manager. Without the password and without the code there is no access – we cannot reset anything.
- In the account you keep your admin links so that they are not lost, and you set logo and colour as your default.
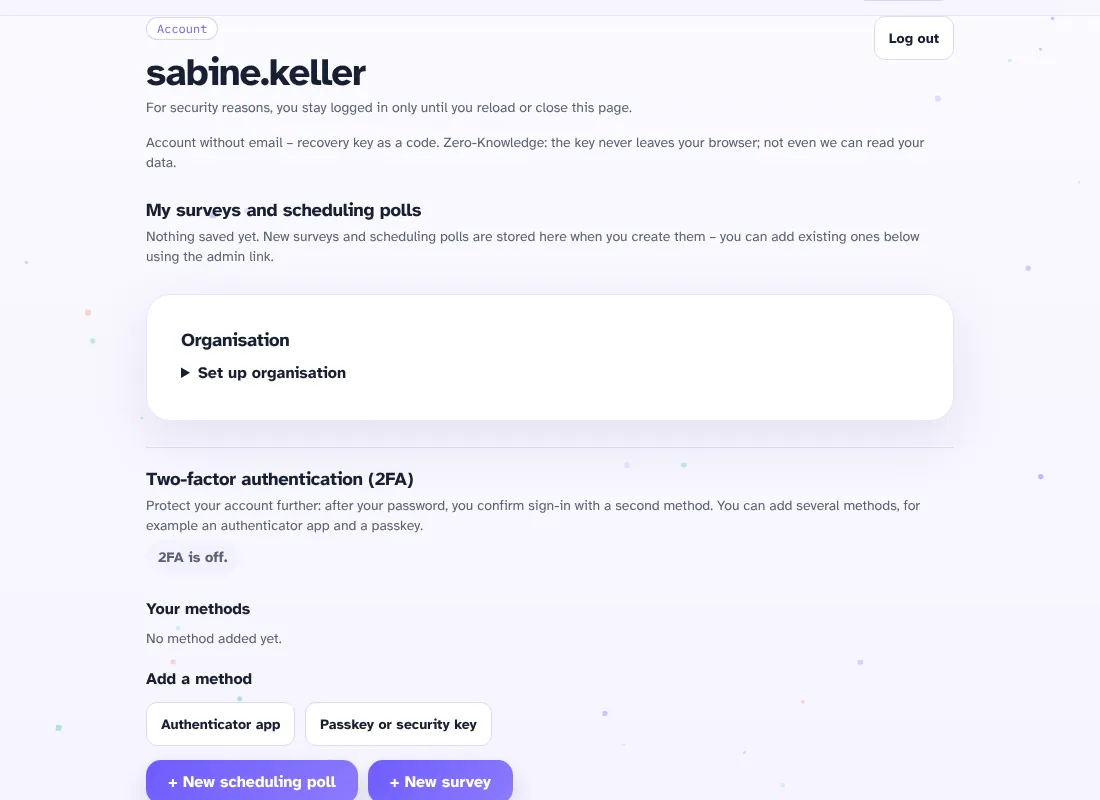
Protect your account with 2FA
Two-factor authentication (2FA) is optional. After the password you confirm the sign-in with a second method. Your data stays encrypted as before; the key to your data remains your password.
- Sign in to your account and open the section “Two-factor authentication (2FA)” at the bottom.
- Choose “Authenticator app” or “Passkey or security key”.
- Authenticator app: scan the QR code with the app (for example Aegis, 2FAS, Google Authenticator, Microsoft Authenticator or Proton Authenticator) or enter the key by hand, type the 6-digit code and choose “Confirm and add”.
- Passkey or security key: give it a name (e.g. “YubiKey”), choose “Add now” and confirm on the device (fingerprint, face, PIN or touching the key).
- Save the recovery codes: after the first method 10 codes appear. Copy them or save them as a file (password manager or printout). Each code works once and is shown only now. Then choose “I have saved the codes”.
Signing in with 2FA: enter username and password, then in the second step use the code from the app, the passkey or key, or a recovery code.
Manage: under “Your methods” you see name, date added and last use. Add several methods (e.g. app and passkey); that is safest when you change devices. “Remove” deletes a method; if you remove the last one, 2FA is switched off. “Generate new codes” invalidates the previous codes.
Lost device: sign in with a recovery code and set up a new method. The recovery key does not bypass 2FA. Without a device and without codes there is no access.
Several domains: a passkey only works on the domain where you set it up (e.g. terminsuche.ch). The authenticator app and recovery codes work on all domains.
Organisation: the admin of an organisation can require 2FA for all members. The last method then cannot be removed. If a member loses all methods, the admin resets their 2FA; the member signs in with the password and sets it up again.
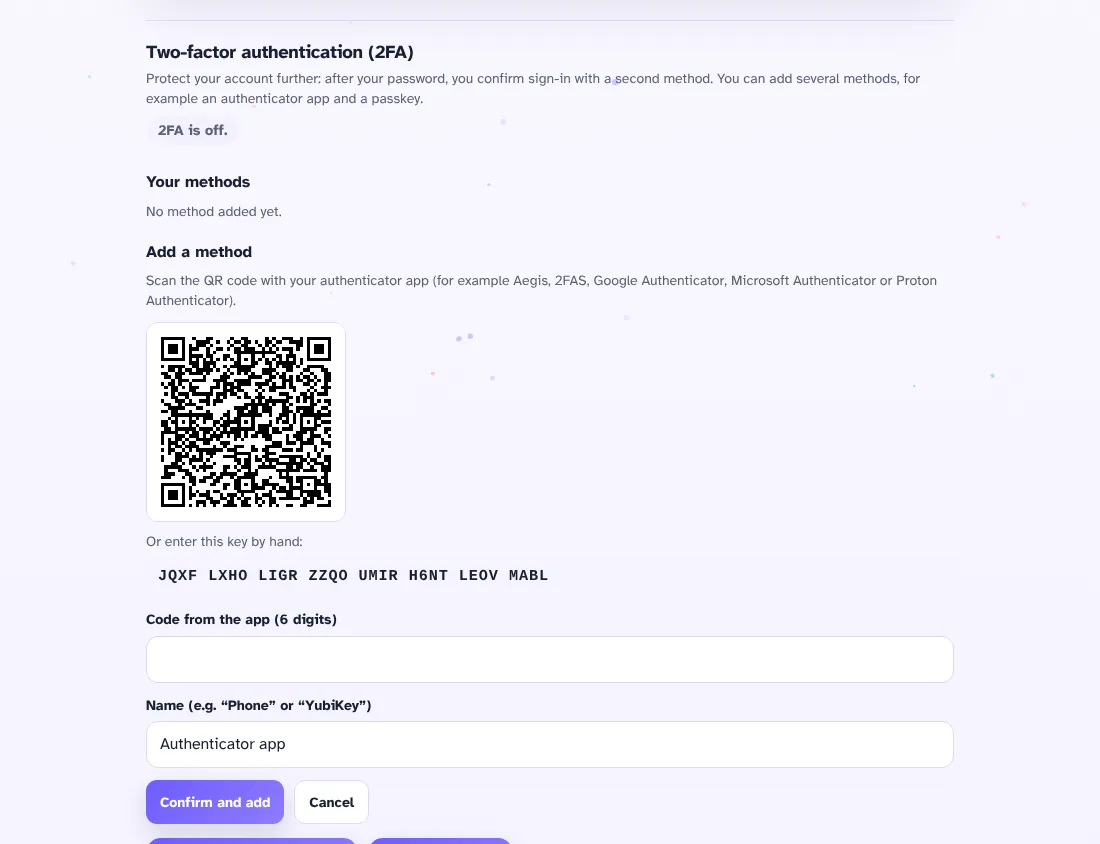
Your own logo and colour
With a Premium plan you give your poll its own look. You find the plans under plans and pricing.
- Open the date poll creator. In the section “Premium licence” enter your licence key and choose “Check”.
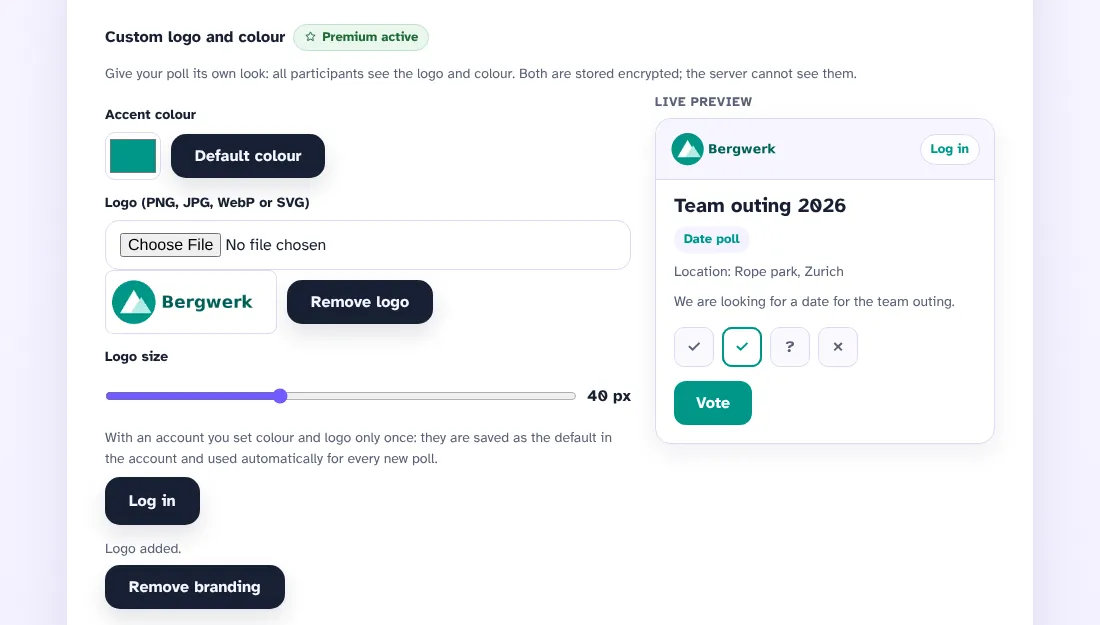
- Open “Custom logo and colour”, choose the accent colour and upload your logo (PNG, JPG, WebP or SVG). Set the size with the slider.
- The live preview shows right away how the poll will look.
- Create the poll. All participants see the logo and colour. Both are stored encrypted; the server cannot see them.
- With an account you set logo and colour only once: they then apply as the default for every new poll.
Templates, PDF and calendar file
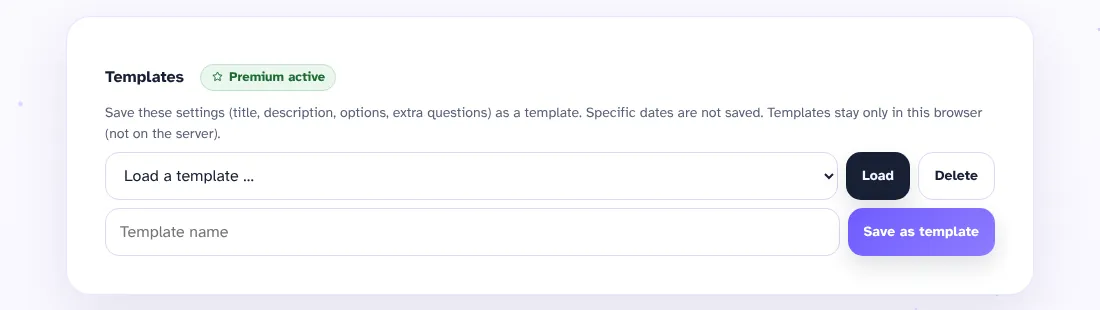
- Templates: “Save as template” stores title, description, options and extra questions (without concrete dates). You load templates in the section “Templates”; they stay in your browser. Teams and organisations also share templates (see below).
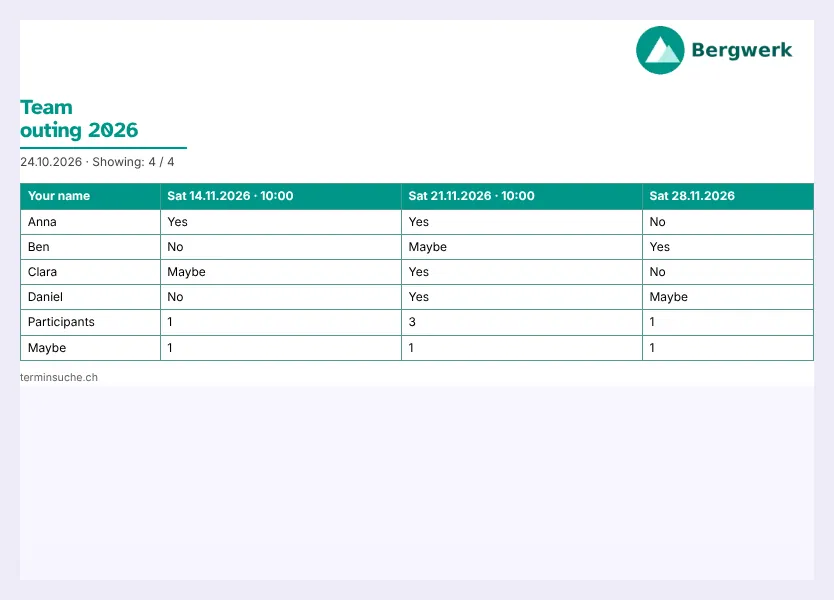
- PDF and print: in the admin link, “PDF / Print” prints the results. With branding your logo appears at the top right and the table uses your accent colour.
- Calendar file: when you set the date, participants add it to their calendar with “Add to calendar (.ics)”.
- Excel: “Excel report” exports exactly the participants you have filtered.
Organisation: teams and members
- Sign in to your account, open “Set up organisation”, enter the licence key (plan “Organisation”) and choose “Create organisation”. Your account becomes the admin of the organisation.
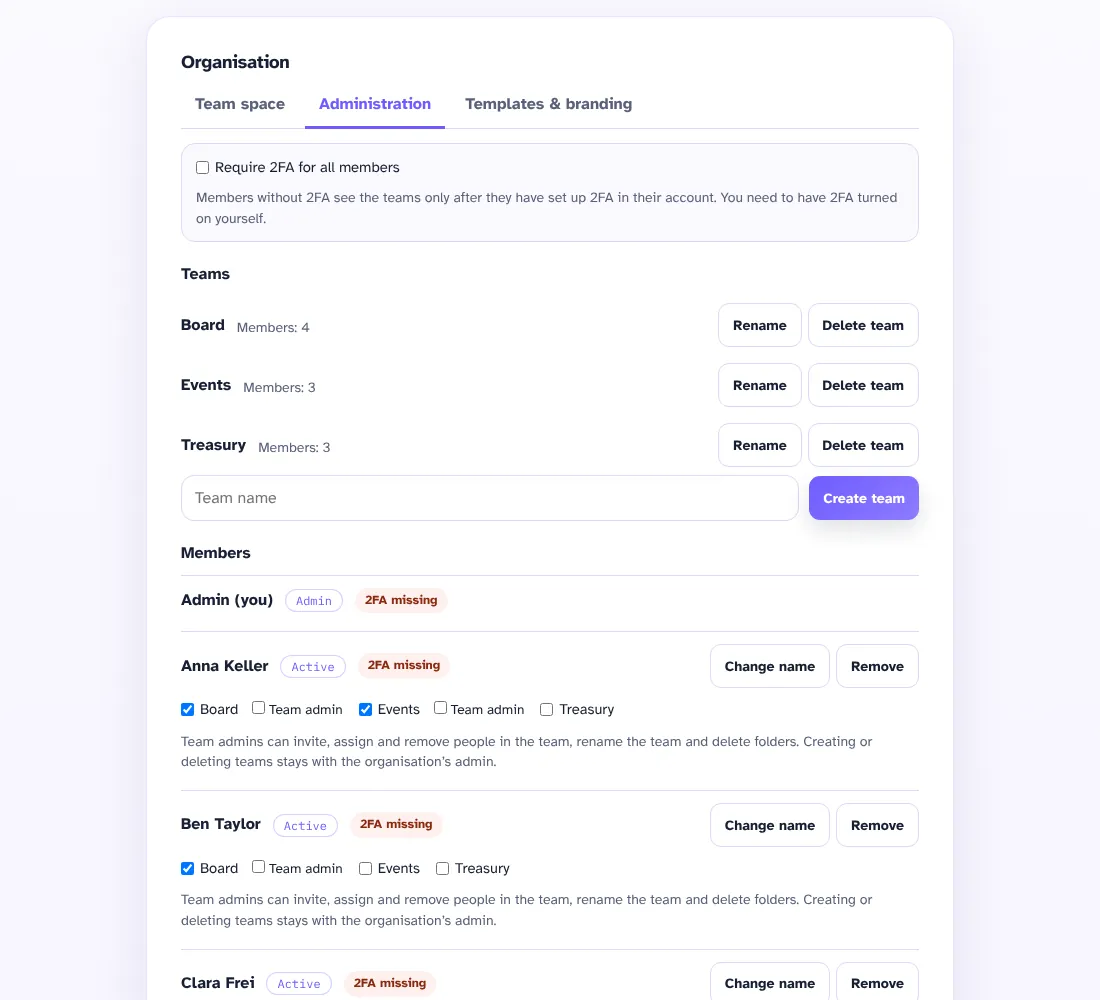
- In the tab “Administration” you create teams, for example Board or Events.
- Under “Invite a member” you enter a name (optional). Under “Access and rights” you choose “Access” for each team and, if needed, “Admin”. Then choose “Create invitation”.
- Send the invitation link to the intended person. It is valid for 14 days. With “New link” you replace it with a new one.
- Optional: require 2FA for all members. Team admins may invite and assign people in their own team.

Accept an invitation to an organisation
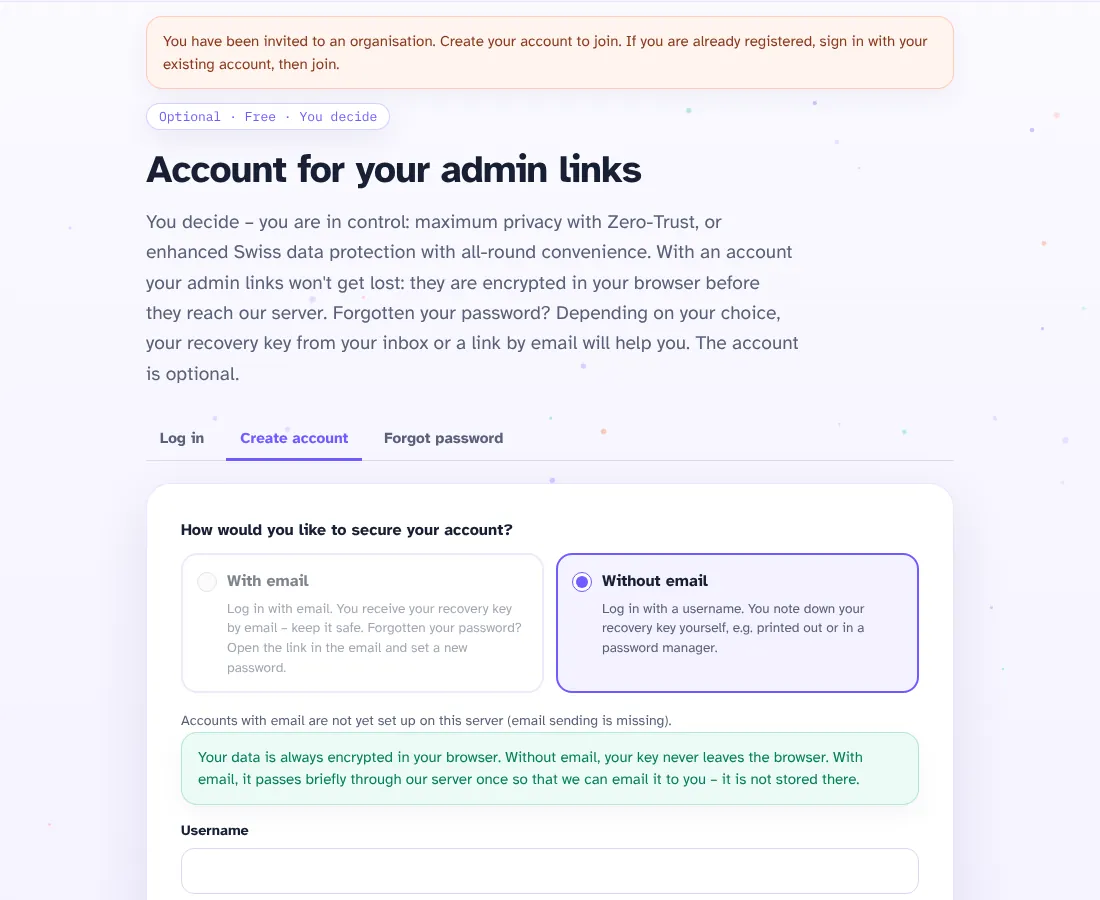
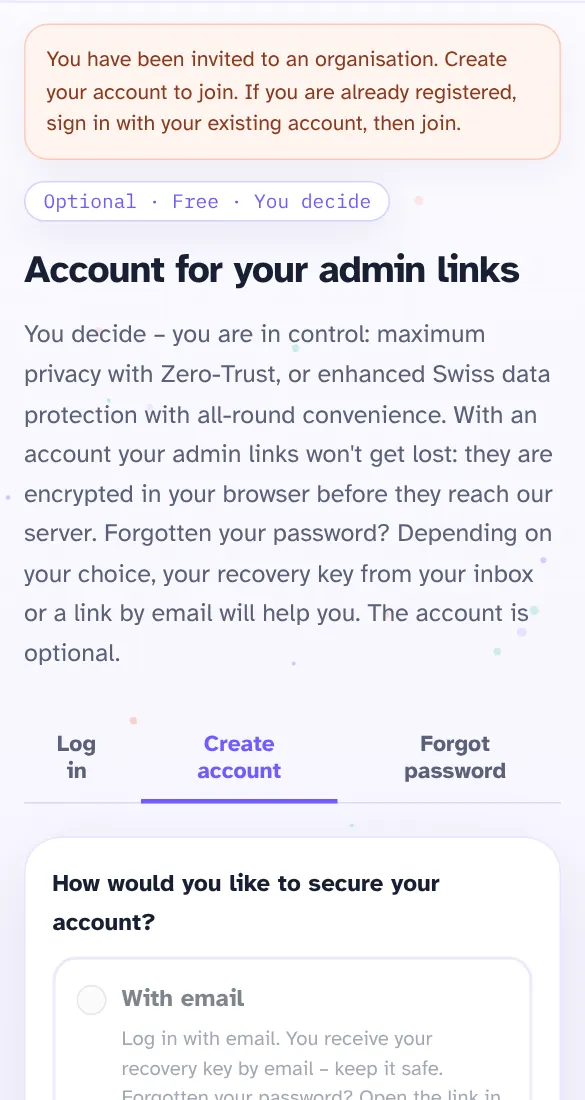
- Open the invitation link. The page shows the window for creating an account right away.
- No account yet? Choose a username and password and keep the recovery code safe.
- Already have an account? Switch to “Log in” and sign in with your existing account to join.
- Choose “Join the organisation”. Afterwards you see the teams you are assigned to in the tab “Team space”.
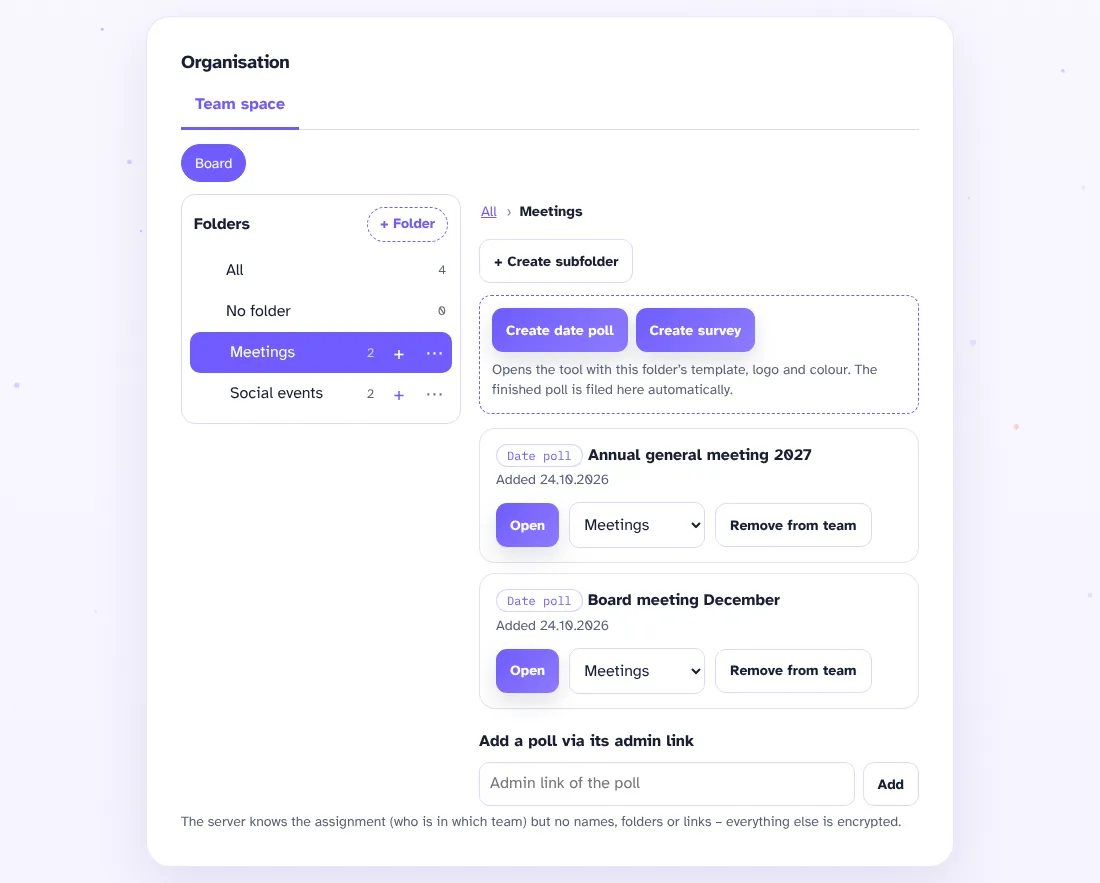
Team storage with folders
- Choose your team at the top. On the left you see the folders as a tree.
- With “+ Folder” you create a folder, with “+” a subfolder. The menu “⋯” offers “Rename folder”, “Template, logo and colour” and “Delete folder”.
- “Create date poll” or “Create survey” opens the tool with the folder’s template, logo and colour. The finished poll is then filed in the folder automatically.
- You add existing polls with their admin link and assign them to a folder.
- Members only see the polls of their teams. The server only knows the team assignment, no names, folders or links.
Shared branding and templates for teams
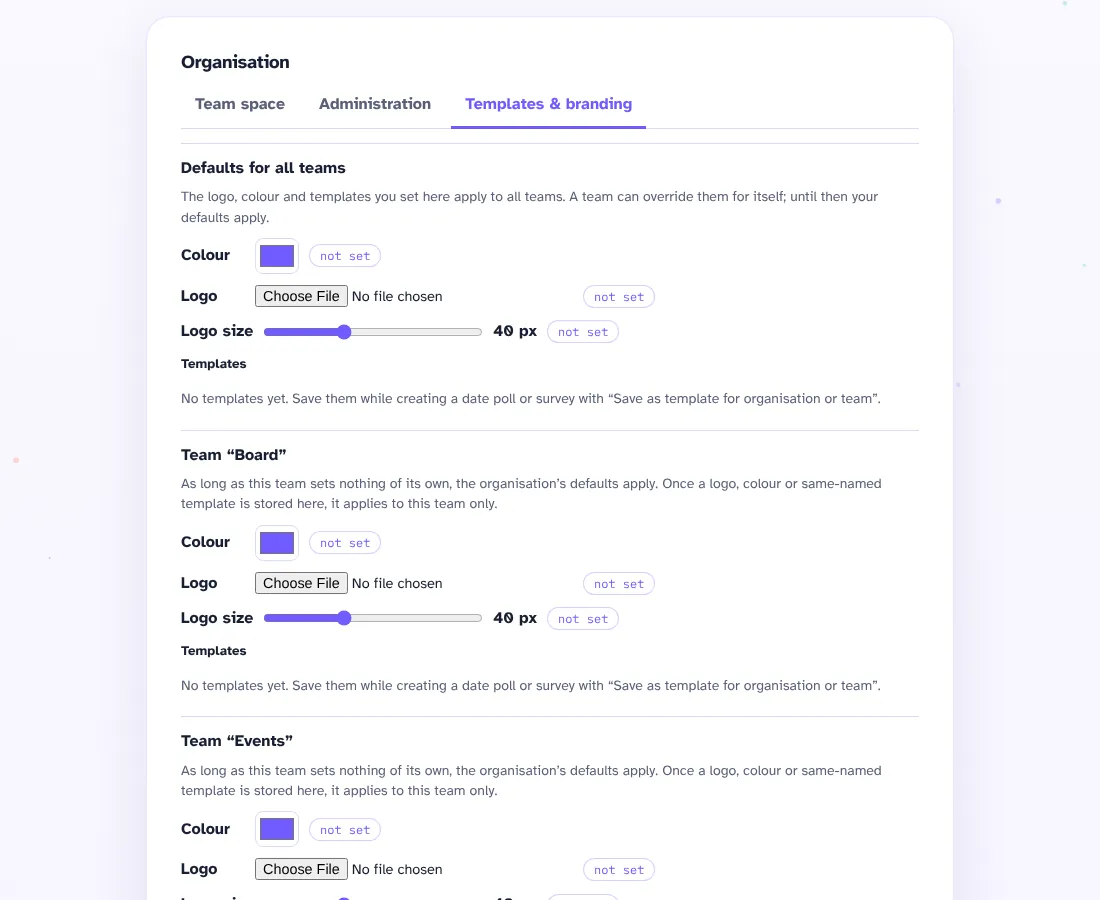
- As admin, open the tab “Templates & branding”.
- First set the defaults for all teams: colour, logo, logo size and templates.
- A team can override them for itself, and a folder can in turn override those of its team.
- You save templates when creating a poll with “Save as template for organisation or team”.